REPAIRS
Custom Assembly, Inc. is equipped and prepared to repair most telecommunication testing products.
How to Send Product in for Repair/Rehab
Packaging:
Box your unit(s) securely, sending only the unit. If sending multiple units, please keep them separated.
What to include:
A short note explaining the reason you are sending the unit in for repair. Please specify if you require specific repairs (i.e. converting, modifying, etc.) Include any P.O. numbers or Repair Authorization Number(s) RMA,
Your daytime phone number,
“Bill To” name and address,
A UPS deliverable address for returning your product to you.
Shipping:
Please ship your unit(s) to:
Custom Assembly Incorporated
Attn: Repair Department
14750 S Swedish Hwy
Danbury, WI 54830
651-261-5131
Repair Process:
When your unit is received, it will be assigned a Repair Return Authorization number. After reading your letter, a technician will evaluate the unit(s) to determine what repairs are needed. If you would like an estimate on your repair, please state so in your letter. Otherwise, it is our option to repair your unit. On occasion, we may recommend it not economical to repair. In such cases, we will notify you of the decision and return your unit should you request so. Upon returning your repair, we will mail you an invoice explaining the repair work. Payment is expected Net 30 or, if you prefer, by MasterCard or VISA. Your repaired unit will be shipped back to you via UPS within the normal turnaround time. Most repairs are completed within 1-2 weeks.
Any questions? Contact Joni at [email protected]
Probe Replacement
INSTRUCTIONS FOR REPLACING A MISSING OR BENT PROBE:
Custom Assembly Incorporated’s Front Tap Shoe field-replaceable probes/pins are easy to replace. If the pin is bent or damaged, simply pull out the bent pin and push in a new one (most CAI Front Tap Shoes come equipped with a pin pouch attached to the cord holding two extra pins).
Make sure to push in far enough so that collar of pin is flush with the base of shoe.
REMOVAL INSTRUCTIONS OF A BROKEN PROBE LEFT INSIDE A RECEPTACLE:
Step 1: If the shaft of the broken probe is exposed, use needle nose pliers to remove broke probe. If the shaft is not exposed please refer to step 2.
Step 2: Using a drill bit (see drill sizes below), insert into the receptacle where the head of the probe has broken off. Putslight amount of lateral pressure on the drill bit and pull out the broken probe (as shown below).
| Series 93 probe: | Use drill bit size #48 or .076" |
| Series 80 probe: | Use drill bit size #51 or .067" |
| Series 70 probe: | Use drill bit size #62 or .038" |
| Probe | Fits TP part |
| 70 series | 1013, 1028 |
| 80 series | 1001, 1034, 1083 |
| 90 series | 1002, 1003, 1004, 1005, 1006, 1010, 1011, 1015, 1016, 1017QF, 10177SS, 1019, 1021, 1046, 1053, 1065, 1066, 1071, 1073, 1076, 1079, 1081, 1084, 1085, 1088, 1089, 1091, 1092, 1097, 1101, 1102, 1103, 1104, 1108, 1112, 1114, 1118 |
Click this link for VIDEO DEMONSTRATING HOW TO REMOVE OR REPLACE PROBES/PINS: http://www.youtube.com/watch?v=EI3KDCgLDKg
We are unable to repair the following Front Tap Shoes:
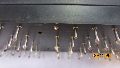
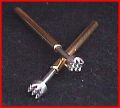
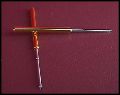
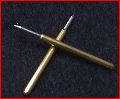
Tyco Dat@term Front Tap Shoes
Please contact Tyco directly for repairs at their Call Center
Phone: 1-888-8901
TYCO TOOLING REPAIR DEPARTMENT is located at:
TYCO ELECTRONICS
Tooling Repair Department
627 N. Grant Street
Waynesboro, PA 17268
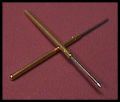
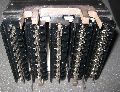
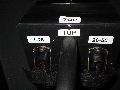
Below are images of the Tyco Dat@term Front Tap Shoes


No services to display.